Gingerbread House
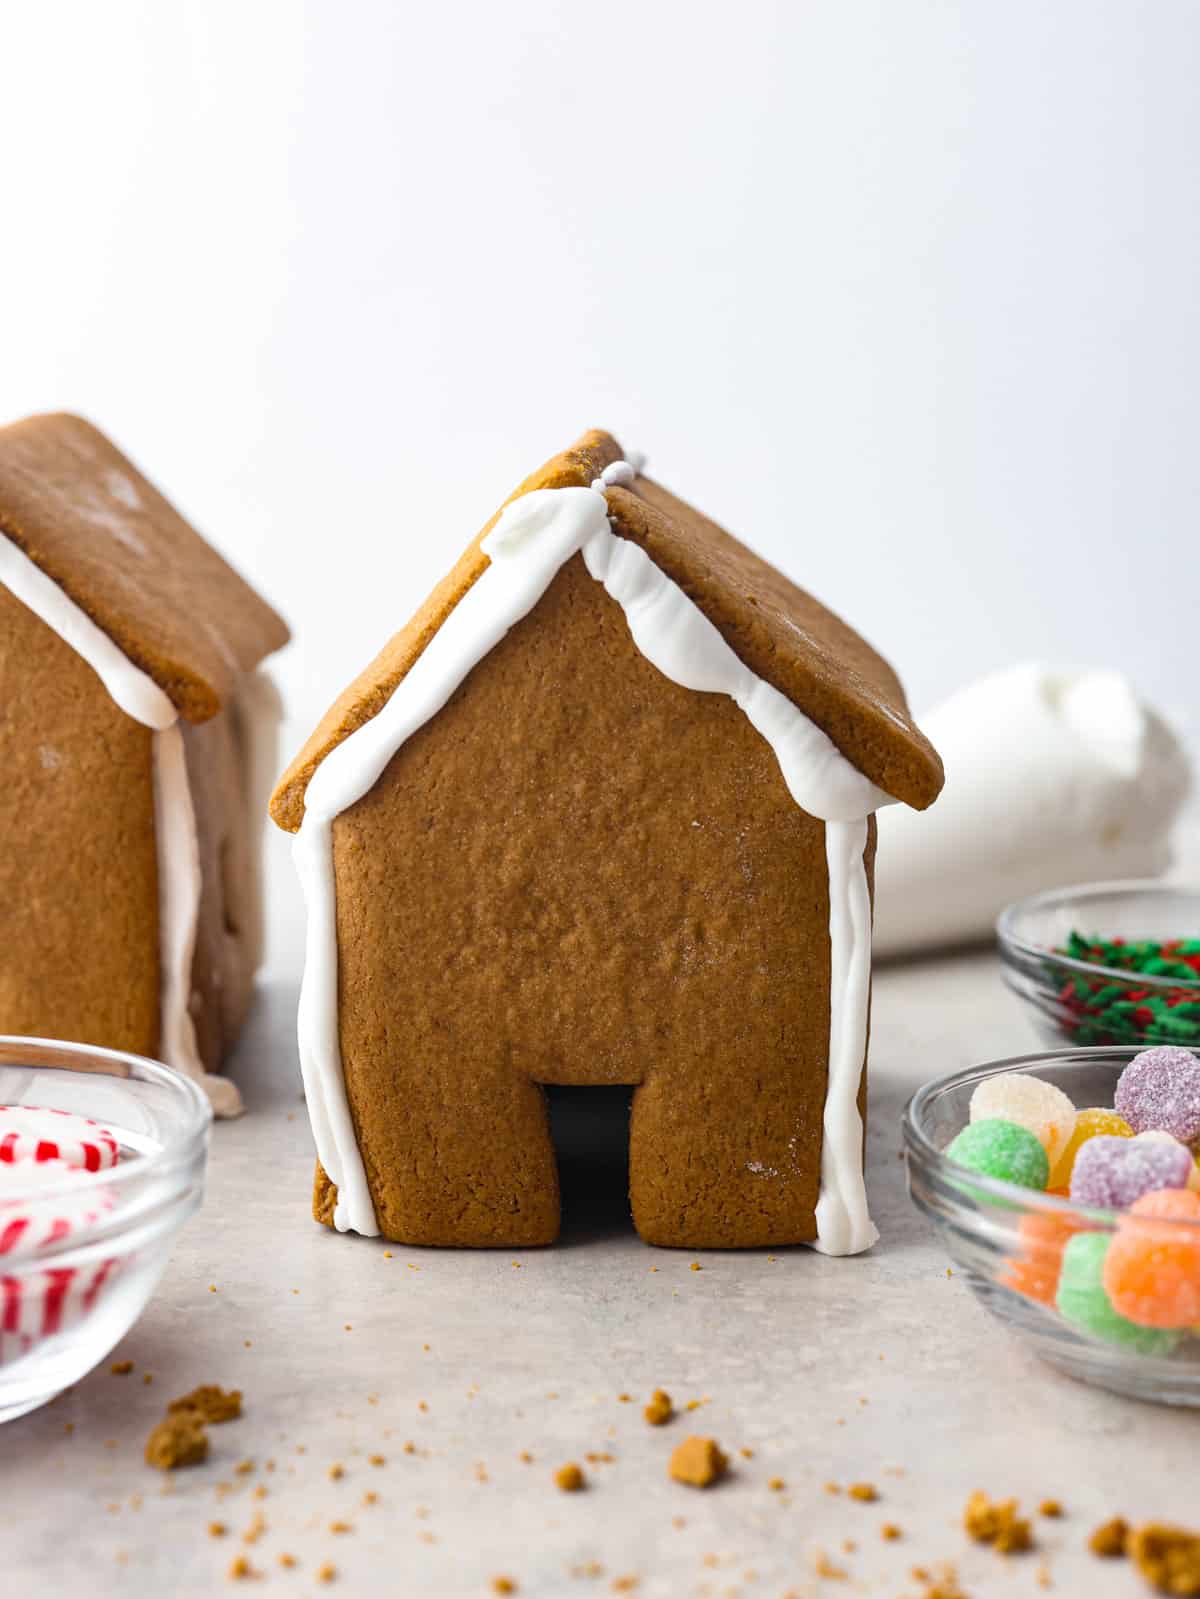
Nothing says holiday season like a Gingerbread house sitting on the counter! This recipe includes the recipe for gingerbread, a template to print out the ginger bread house pieces, and how to make the royal icing. This is the perfect recipe for the whole family to enjoy!
I love making desserts together with my family during the colder months. Warming up the house with the oven is my favorite way to spend chilly evenings. I also love the way that the house smells when you have spiced desserts baking. This holiday season you have to try these delicious Pumpkin Pecan Pie Bars, these cute and festive Christmas Tree Sugar Cookies, and this classic Old Fashioned Apple Cobbler.
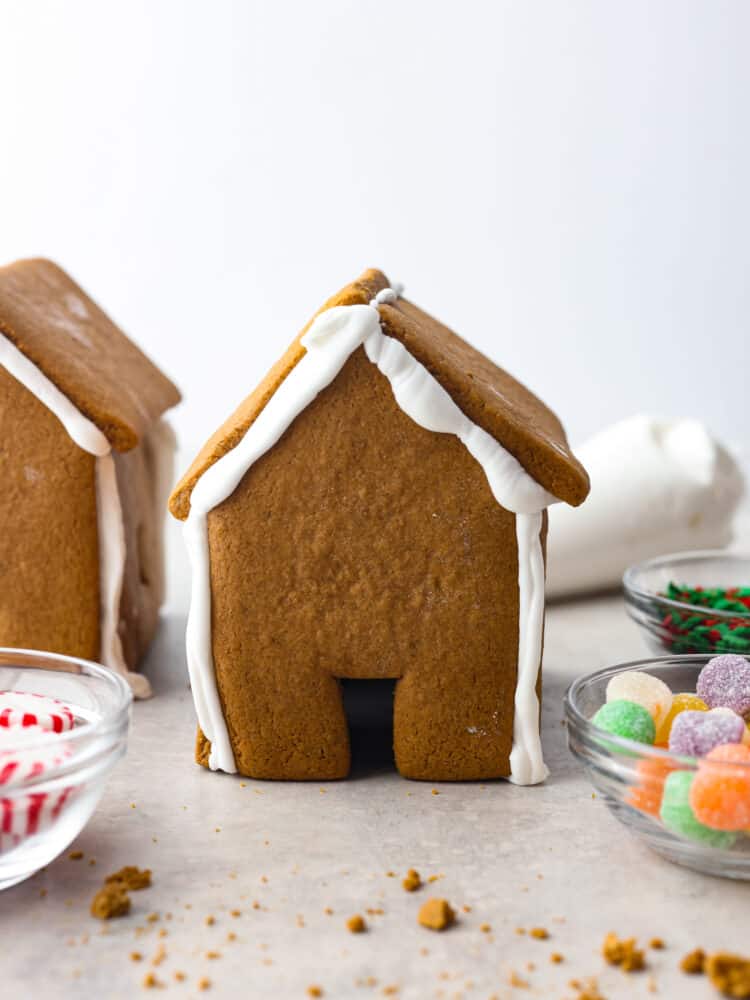
Gingerbread House Recipe
Ok, this is the most fun I’ve had writing a recipe! There is nothing like getting the family together and putting together the most adorable holiday decor. You can also eat the gingerbread house, which is a big bonus. I will say, this recipe is meant to make firm gingerbread that will hold up to the weight of stacking and decorations, so it is pretty hard and not as sweet as traditional gingerbread. But if you want some gingerbread that is soft and delicious, you can make these cute gingerbread people to go with your houses!
This recipe comes with everything you will need to build your houses! First, print off the templates for the houses. Then make the gingerbread dough and cut out the pieces. While the pieces are baking, make your royal icing that will act as the glue. Then you get to decorate! The decorations are up to you, but gum drops, candy canes, and peppermint candies make great additions. So whip up some white hot chocolate or wassail and get to baking!
Ingredients
You are making a cookie dough, so you will need the basic pantry items. You will also need molasses to make these gingerbread houses, which you should be able to find in the baking aisle of your grocery store. Don’t forget to pick up the meringue powder as well, you will need it to get your icing nice and firm! You can find exact measurements below in the recipe card.
Gingerbread
- Butter: You will want unsalted butter, and make sure to leave it out so that it is at room temperature when you go to make your dough.
- Dark Brown Sugar: Dark brown sugar has a deeper flavor and color because it has more molasses in it. It will make a difference in your dough.
- Granulated Sugar: Your regular pantry sugar will work great.
- Vanilla: Vanilla extract gives the cookie a little extra vanilla flavor and brings out the other warm flavors in the gingerbread.
- Molasses Unsulphered: Most molasses is unsulphered. It is the more pure version of molasses and it is what you will want for this dough.
- Egg: I always use grade A eggs in my recipes.
- All-Purpose Flour: Your regular pantry flour will work great for this recipe.
- Ground Cinnamon: Cinnamon is a warm spice that is a MUST in gingerbread!
- Ground Ginger: Ginger gives a little spice to the cookie, and makes it taste warmer. You will miss this flavor if you leave it out!
- Cloves: Ground cloves are actually a little sweet, but still have a warm flavor.
- Salt: Salt brings out all of the flavors in this dough and helps to cut down on sweetness.
- Baking Powder: Baking powder helps the dough rise while it’s baking in the oven. You don’t want it to rise a lot. Just enough to make a nice looking cookie.
- Milk: Milk has fat that helps the ingredients come together and adds great flavor.
Royal Icing
- Powdered Sugar: Powdered sugar is really fine sugar that makes the perfect royal icing. It melts into the water and becomes really smooth and shiny.
- Meringue Powder: Meringue powder is a stabilizer that helps the royal frosting get stiff. It will be the perfect consistency to act as your glue for the gingerbread house with this ingredient.
- Water: You can adjust the consistency of the frosting by adding more or less water. If the frosting gets too runny, then add more powdered sugar until it gets thicker.
How to Make a Homemade Gingerbread House
This is such a fun recipe! The dough is not hard to make, which makes this the perfect recipe to make with kids and friends. It also makes the house smell like the holidays and fills the kitchen with Christmas cheer! I loved making this recipe, and I know you’ll enjoy it too.
Make Dough
- Prep: Preheat the oven to 375° and line two baking sheets with parchment paper. Set aside.
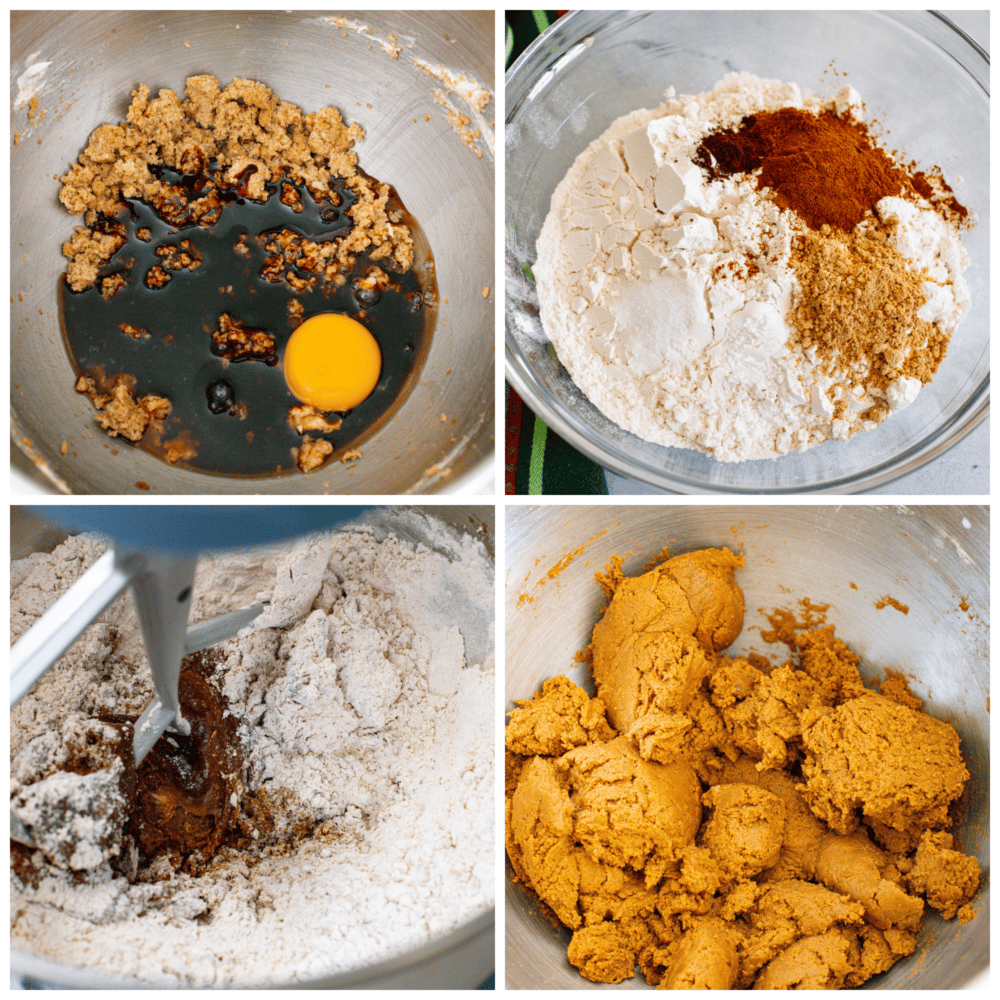
- Cream Butter and Sugar: In the bowl of a stand mixer, use the paddle attachment to beat together the butter, both sugars and vanilla until light and fluffy, about 3 minutes. Scrape down the sides and bottom of the bowl and add the molasses and egg. Beat again for 1-2 minutes, until incorporated.
- Whisk: In a medium bowl, whisk together the flour, cinnamon, ginger, cloves, salt, and baking powder. Add the dry ingredients to the wet and mix on low until a dough begins to form. Scrape down the sides and bottom of the bowl again before mixing on medium speed. Add the milk to help the dough not be too crumbly.
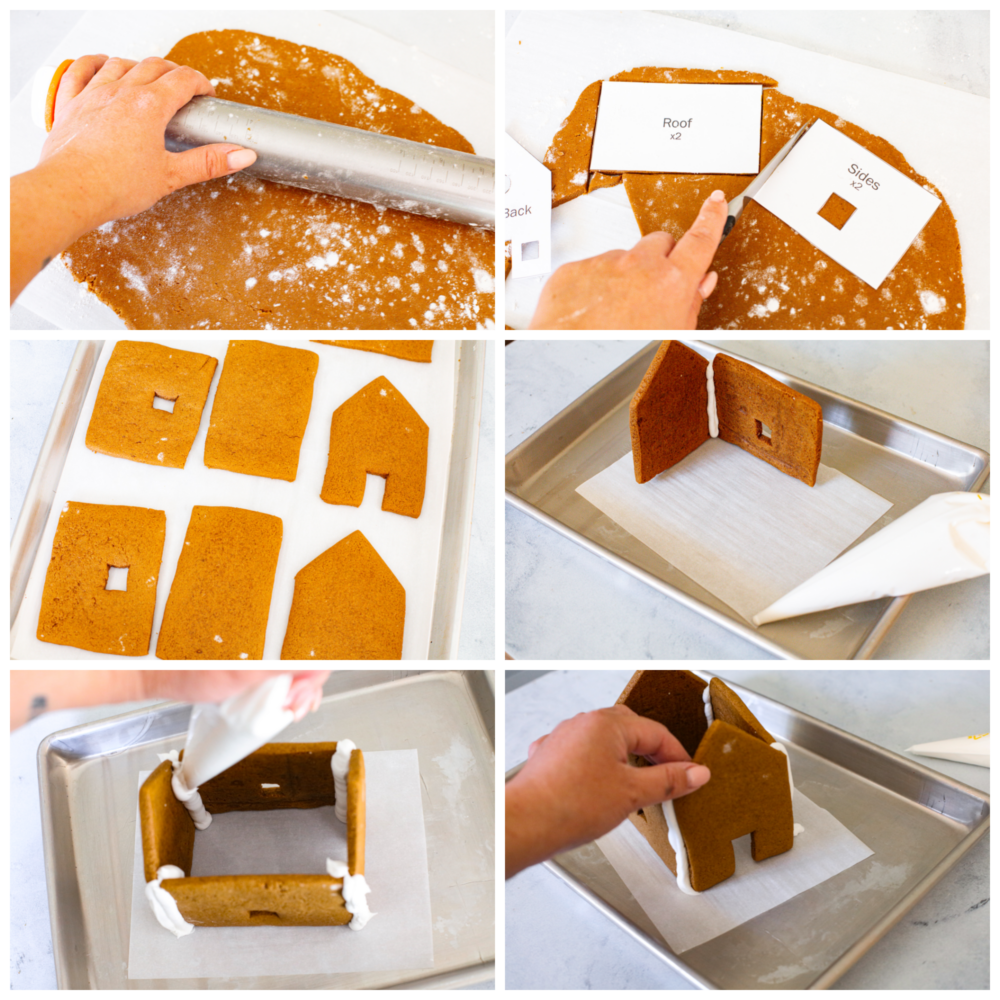
- Roll Out Dough: Transfer the dough to a lightly floured surface and roll out to ¼ inch thick. Using the already printed and cut out template for the house pieces, use a sharp paring knife to cut out the pieces of the house.
Bake and Make Frosting
- Bake: Carefully transfer the cut-out gingerbread house pieces to the prepared baking sheets, leaving at least 2 inches between them. Bake for 11-14 minutes, until the edges and centers are set. Let cool completely on the baking sheets.
- Make Icing: Once completely cooled, prepare the royal icing to use as glue for construction.
- Whisk: In the bowl of a mixer, add the powdered sugar and meringue powder. Whisk together. Add 4 tablespoons of water and use the paddle attachment to mix on low speed. As the powdered sugar becomes more moistened as it mixes, increase the speed and beat until a very thick, smooth icing is made. If it is not moist enough to incorporate all the dry ingredients, add the 5th tablespoon of water. This icing should be very, very thick in order to hold together the heavy gingerbread.
- Prep Piping Bag: Transfer the royal icing to a piping bag or a large ziplock bag. It will dry quickly if left exposed, so be sure to cover any extra icing tightly with plastic wrap.
Assemble The Houses
- Assemble: Assemble the houses by using the royal icing as glue. Be generous and work quickly, as the royal icing will begin to crust over quite quickly. Pipe icing along the side of the front of the house then press the side piece to it to form the first corner. Repeat with the second side.
- Pipe: Pipe icing along the two sides of the back piece and press firmly against the two standing sides to form the third and fourth corners. Add more icing the inside of the corners as needed to reinforce their stability.
- Add Roof: Pipe icing along the roofline and top of the side on one side of the house. Press the first roof piece in place. Outline the remaining opening with icing and carefully press the last roof piece on. This is the trickiest piece to put on and must be done carefully so the rest of the house does not collapse.
- Dry: Allow the houses to sit at least 24 hours to let the royal icing dry and harden before decorating.
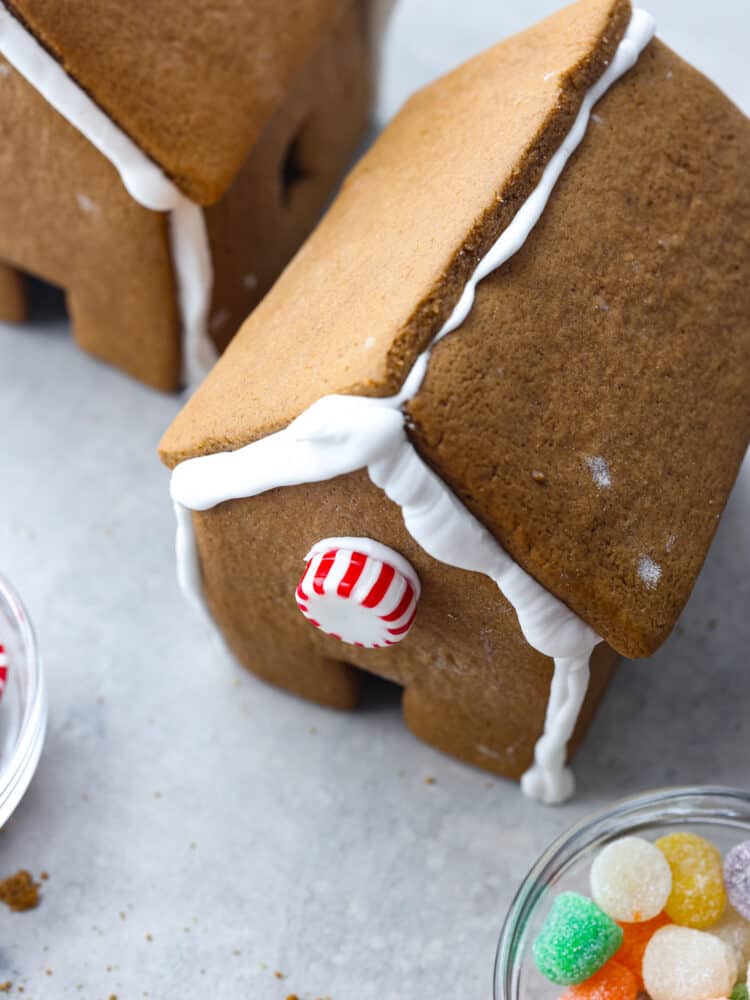
Tips for Making Gingerbread Houses
If this is your first time making gingerbread, then you will want to read through these tips. It isn’t hard, but it helps to know a little about your dough!
- About this Gingerbread: This recipe isn’t really designed for gingerbread to eat, more so for a stable building gingerbread (also called construction grade gingerbread). It IS edible and it tastes pretty good, but it’s not as sweet as a regular gingerbread cookie.
- Softer Gingerbread: It can be baked a few minutes less for a softer bite (but not recommended for houses/structures because it won’t withstand the weight of the royal icing) and it can be baked a few minutes longer for an even stronger construction cookie.
- Using Another Template: If using a different house template, the baking time will vary because of the size. The larger the piece, the longer the bake.
- When Chilling Before Baking: It can be chilled before cutting or baking, but will need at least an extra minute or two in the oven.
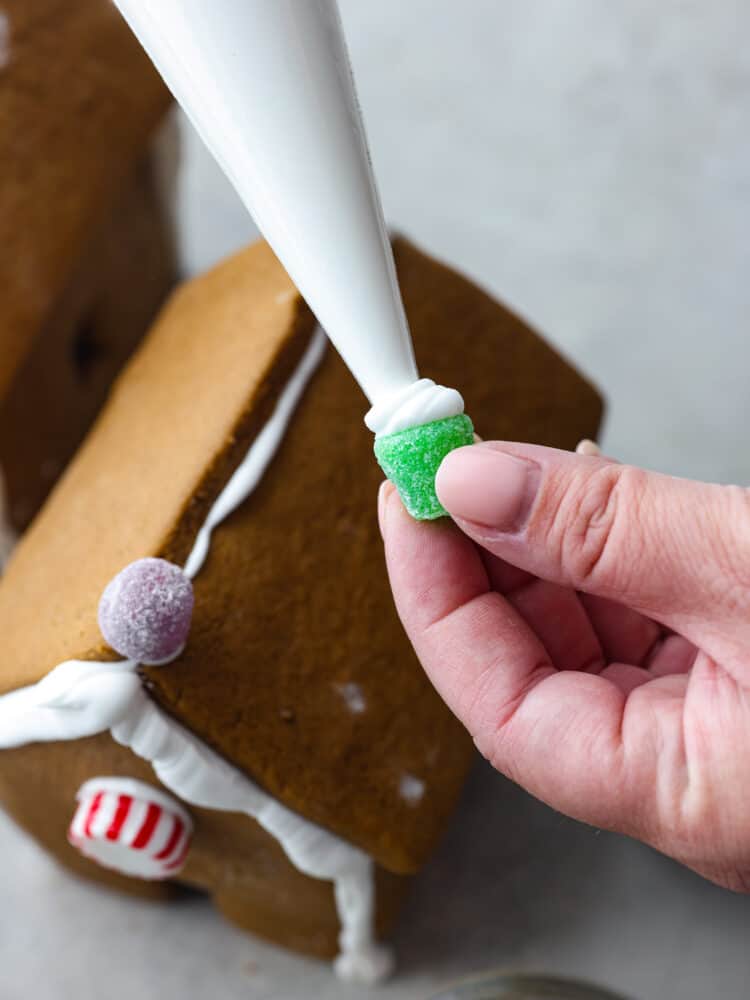
Storing Gingerbread Houses
If you are not planning on eating your gingerbread house, then it is really easy to store! You will want to keep it out on the counter for everyone to see and enjoy!
- On the Counter: Keep your gingerbread house on your counter to enjoy throughout the holidays. It will last on your counter as long as you want to show it off! If you plan to eat it, keep it in an airtight container or wrapped in plastic wrap. It will last for about a week. After a week it will be too hard to eat!
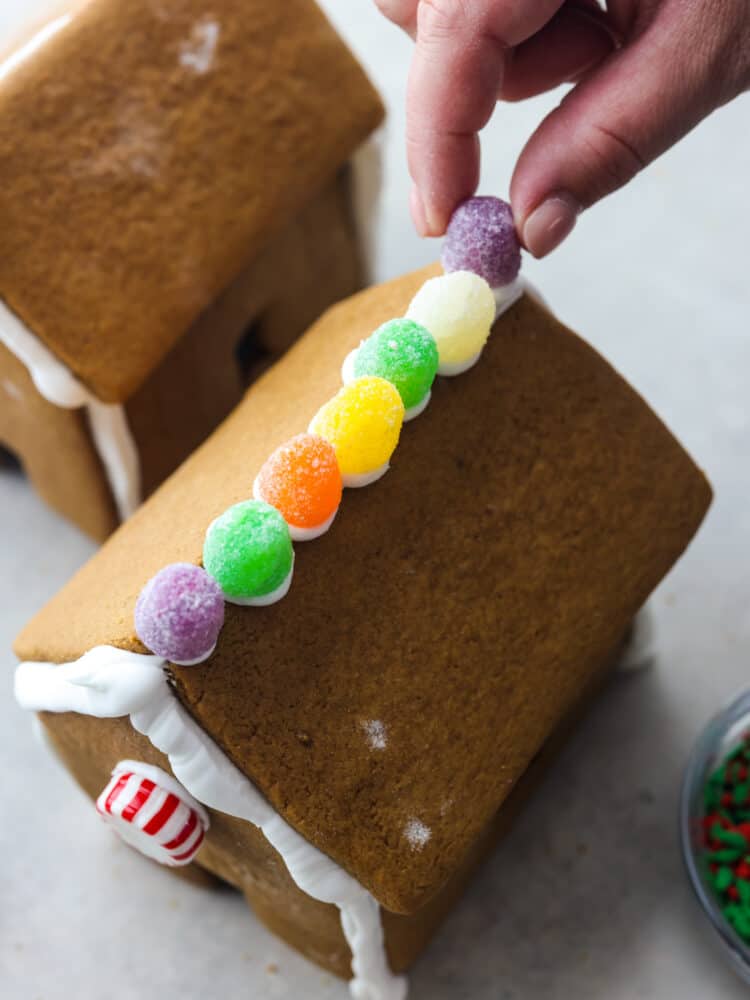

Gingerbread House
Ingredients
Gingerbread
- 6 Tablespoons Unsalted Butter Softened
- ¾ Cup Dark Brown Sugar
- 2 Tablespoons Granulated Sugar
- 2 Teaspoons Vanilla
- ½ Cup Molasses Unsulphered
- 1 Egg
- 3 Cups All-purpose Flour
- 1 Tablespoon Ground Cinnamon
- 1 Tablespoon Ground Ginger
- ½ Teaspoon Cloves
- ½ Teaspoon Salt
- ½ Teaspoon Baking Powder
- 2 Tablespoons Milk
Royal Icing
- 4 Cups Powdered Sugar
- 3 Tablespoons Meringue Powder
- 6-7 Tablespoons Water
Instructions
-
Preheat the oven to 375° and line two baking sheets with parchment paper. Set aside.
-
In the bowl of a stand mixer, use the paddle attachment to beat together the butter, both sugars and vanilla until light and fluffy, about 3 minutes. Scrape down the sides and bottom of the bowl and add the molasses and egg. Beat again for 1-2 minutes, until incorporated.
-
In a medium bowl, whisk together the flour, cinnamon, ginger, cloves, salt, and baking powder. Add the dry ingredients to the wet and mix on low until a dough begins to form. Scrape down the sides and bottom of the bowl again before mixing on medium speed. Add the milk to help the dough not be too crumbly.
-
Transfer the dough to a lightly floured surface and roll out to ¼ inch thick. Using the already printed and cut out template for the house pieces, use a sharp paring knife to cut out the pieces of the house.
-
Carefully transfer the cut-out pieces to the prepared baking sheets, leaving at least 2 inches between them. Bake for 11-14 minutes, until the edges and centers are set. Let cool completely on the baking sheets.
-
Once completely cooled, prepare the royal icing to use as glue for construction.
-
In the bowl of a mixer, add the powdered sugar and meringue powder. Whisk together. Add 4 tablespoons of water and use the paddle attachment to mix on low speed. As the powdered sugar becomes more moistened as it mixes, increase the speed and beat until a very thick, smooth icing is made. If it is not moist enough to incorporate all the dry ingredients, add the 5th tablespoon of water. This icing should be very, very thick in order to hold together the heavy gingerbread.
-
Transfer the royal icing to a piping bag or a large ziplock bag. It will dry quickly if left exposed, so be sure to cover any extra icing tightly with plastic wrap.
-
Assemble the houses by using the royal icing as glue. Be generous and work quickly, as the royal icing will begin to crust over quite quickly. Pipe icing along the side of the front of the house then press the side piece to it to form the first corner. Repeat with the second side.
-
Pipe icing along the two sides of the back piece and press firmly against the two standing sides to form the third and fourth corners. Add more icing the inside of the corners as needed to reinforce their stability.
-
Pipe icing along the roofline and top of the side on one side of the house. Press the first roof piece in place. Outline the remaining opening with icing and carefully press the last roof piece on. This is the trickiest piece to put on and must be done carefully so the rest of the house does not collapse.
-
Allow the houses to sit at least 24 hours to let the royal icing dry and harden before decorating.
Nutrition
from The Recipe Critic https://ift.tt/BZAGf8l
via gqrds



Comments
Post a Comment